
HubSpot is an inbound marketing and sales platform that helps companies attract visitors, convert leads and close sales.

The platform has automation tools for marketing, sales, content management, operations and customer relationship management. GoToWebinar makes hosting virtual events like webinars easy and quick. Videos, polls, data on attendees and webinar performance as well as automated emails to registrants are what make it one of our preferred options.
At HEEDGROUP, we regularly use both these softwares for our clients. Connecting GoToWebinar (https://gotowebinar.com) and HubSpot (https://www.hubspot.com) is key to registrant nurturing and a customized branded marketing campaign for our clients. We use HubSpot to personalize the email campaigns for webinar registrants; this includes attaching a personalized join URL to the webinar for each registrant. The native integration between GoToWebinar and HubSpot does not give you complete control for this level of customization. Out of the GoToWebinar box - you have the option to send nurturing emails but customization and data tracking in your single Marketing database (this case HubSpot) is not possible. Yet, we still wanted to use GoToWebinar and HubSpot together. But How?
We tried to find a solution on integrating the two, the sources we came across were outdated and simply didn’t work. So, we figured it out and decided to share it here with you.
Step 1: Basic Integration
Integrating GoToWebinar and HubSpot
- Login to your GoToWebinar and HubSpot accounts. Remember, you must have valid licenses/accounts in both systems for this integration to work.
(PRO TIP: we have our clients sign-up for the pay as go option for ‘GoToWebinar Flex Plan’ when they are just starting to develop webinars on their own. For other clients, they have graduated to the enterprise version.) - In HubSpot, click the Marketplace icon between the search and settings icons in the top navigation bar. Under Manage, select Connected apps.
- Click on the ‘Visit App Marketplace’ button on the upper right side.
- Search for GoToWebinar and select it from the results. Once that page opens, click ‘Install App’.
- Enter your GoToWebinar login credentials and sign in. Your accounts will be connected immediately after logging into GoToWebinar through the HubSpot connection.
Completing this basic step will ensure we have a smooth sailing experience in more advanced and complicated steps. But, keep going because it’s really not that hard. :-)
Step 2: Override GoToWebinar Automatic Emails
Since HubSpot is the Marketing automation platform we use and several of our clients use, we want to send branded emails through HbSpot and then track user actions for those webinar emails in HubSpot as well. GoToWebinar has built in nurture emails for their webinar product -- it is necessary to turn off this feature in GoToWebinar. You do not want your registrants to get swamped with confirmation emails from both tools. It is best to be concise in your communications to the registrants, pre- and post-webinar.
- Go to your GoToWebinar account dashboard.
- Find the webinar you’re working on, click on the webinar title. It will open up the webinar details.
- Scroll down to ‘Emails’ and click on the dropdown arrow on the right to expand the section.
- The Reply-To field will be the account admin or webinar organizer’s name and email.
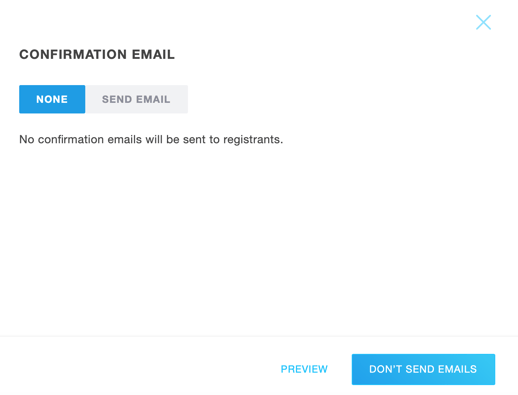
- For the ‘Confirmation Email to Registrants’ field, click on the dotted border box and select ‘None’ and then ‘Don’t Send Emails’.
- This should switch the ‘Reminder Email’ field to ‘Do Not Send a Reminder Email’ automatically.
- For the ‘Follow Up Email’ to attendees and absentees, do the same as step 5.
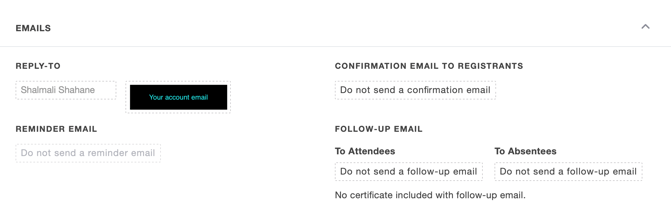
- Once all of the above steps are completed, the Email section in GoToWebinar should be configured like the picture below.
Step 3: Extract the ‘Join Webinar’ URL from GoToWebinar and save it as a Contact Property in HubSpot
The ‘Join Webinar URL’ that GoToWebinar generates is unique to each registrant. With the basic integration between GoToWebinar and HubSpot, you cannot get this personalized Join Webinar URL into HubSpot.
At webinar time, it is important that each registrant joins through their unique link because we want specific tracking data for each attendee, for example time of joining the webinar, how long they stayed, their attentiveness, and more.
So, how do we do that?
Since we want to send this personalized ‘Join Webinar’ link through our email campaigns in HubSpot, we turn to a third tool, Zapier (https://zapier.com). Zapier allows API integrations to easily happen between different web apps. Copying each registrant’s Join Webinar URL to HubSpot is an option that is simply too time consuming - what if you have a couple thousand registrants or more? By using Zapier, we are able to connect the web apps and create a Zap in Zapier and extract the personalized registrant link (Join Webinar URL) from GoToWebinar into HubSpot. More on Zapier in step 4.
We have more to do in HubSpot though because in order for us to use the personalized link in HubSpot, we need to store the Join Webinar URL as a contact property in HubSpot. Let’s go through that now.
- In your HubSpot portal, click ‘Contacts’ and then again select ‘Contacts’ from the dropdown.
- On the right, there will be a button for ‘Actions’. Select ‘Edit Properties’ from the dropdown.

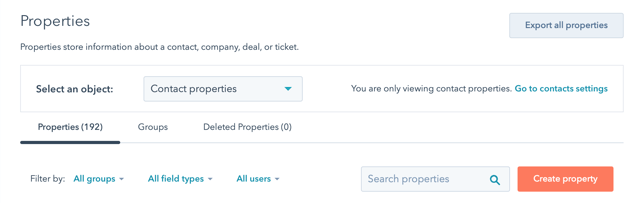
- Once the properties page opens up, click on ‘Create Property’.
- The next step is to create a contact property for the Join Webinar URL that can be associated with an individual contact in HubSpot. Fill out the form as shown in the image below. You can change the label name to your liking, our choice is ‘GoToWebinar Join URL’. Click ‘Next’.

- Select ‘Single-Line Text’ from the next form page and check the box for ‘Show in Forms’.
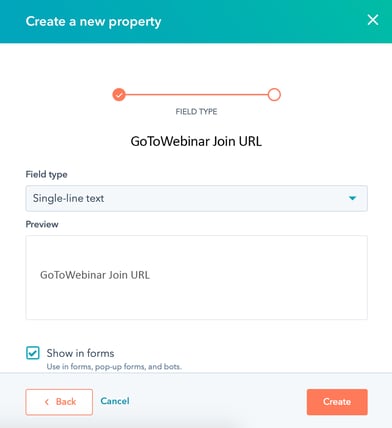
- Finally, click ‘Create’ and your property is ready!
Step 4: Create a Zap!
Zapier will allow us to pull in the personalized Join Webinar URL from GoToWebinar to HubSpot now that we have a contact property for it to be associated with in HubSpot (see Step 3). A zap is an automated workflow that runs automatically in your applications. You set up Zaps in Zapier and then trigger them to run in your other applications. In this case, our zap is going to pull in the personalized Join Webinar URL from GoToWebinar into our Hubspot emails through the contact property.
- Create an account in Zapier if you don’t already have one. The zap that you will be creating is a premium zap, so make sure your account will allow the same.
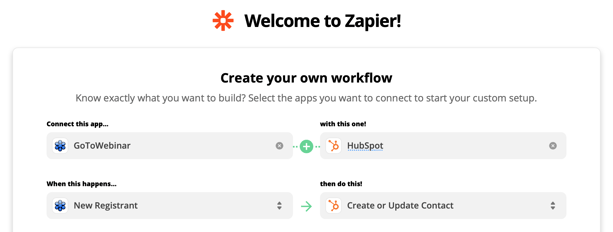
- Fill the quick form with the selections in the image below.
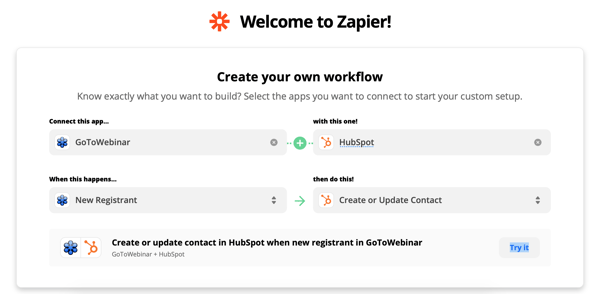
- The related zap will pop up automatically in the same box. Click ‘Try it’.
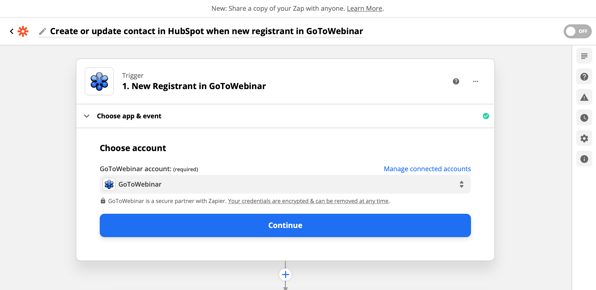
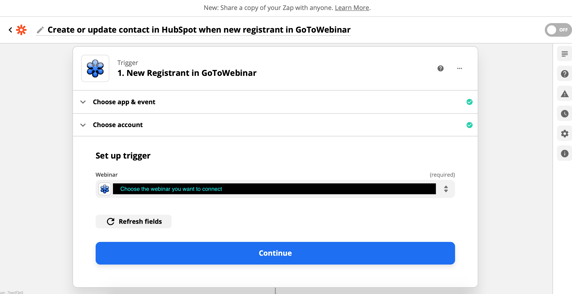
- The new page will ask you to first connect your GoToWebinar account and then the specific webinar you want. Click ‘Continue’ once you’ve made the right selections.
- The next step will be connecting the account for HubSpot.
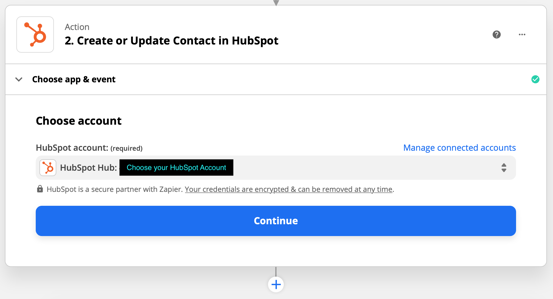
- Now, you will have to set up the action. Here you will see all the contact properties that are in your HubSpot account, including the ‘GoToWebinar JoinURL’ we just added as a contact property in the last step. The form for this action may seem long and daunting, but you only need to fill the parts you need!
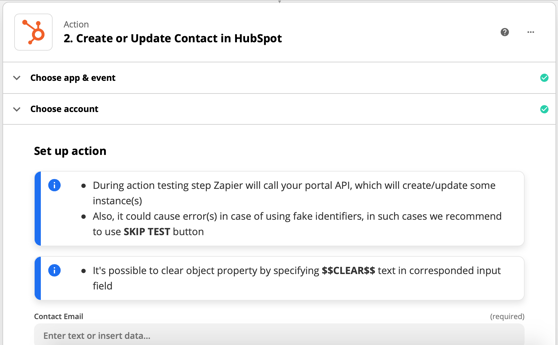
- First, select the ‘Contact Email’ field and the corresponding HubSpot property (in our case, ‘Email’). This tells Zapier that the “Contact Email” property from HubSpot should be aligned with the “Email” property in GoToWebinar. This is how it will determine unique entries.
- Scroll down in the form till you see a section for ‘Contact Information: GoToWebinar JoinURL or whatever name you assigned to the property when you created the contact property in HubSpot. Click the dropdown and select the option ‘Join URL’ shown in the image below.

- The other fields are optional. All we needed to do was align the GoToWebinar property with HubSpot’s.
- Scroll down and click ‘Continue’ to save the zap.
- Don’t forget to test the trigger. Zapier will prompt you to do the same so don’t worry about searching for the test option.
Step 5: Create a HubSpot Registrants List
Since the webinar will have a good number of registrants, it is necessary to create a registrant list in HubSpot. We will be creating this list specifically for registrants with a Join Webinar URL.
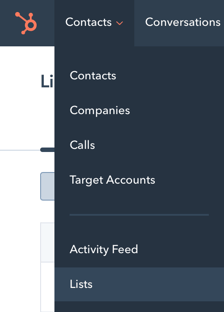
- Click on ‘Contacts’ from the top menu, and select ‘Lists’ from the dropdown.
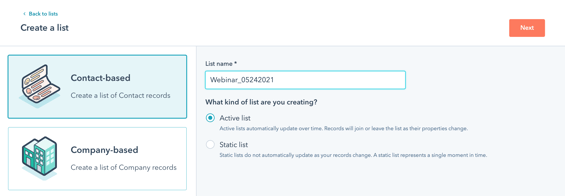
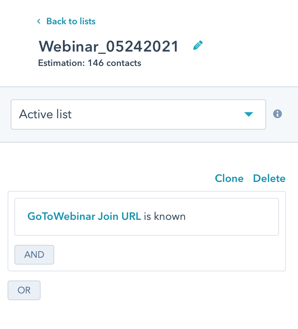
- Click on ‘Create List’ and select ‘Contact Based’ and ‘Active List’. Name the list and click ‘Next’.
- For ‘Filter type’, choose ‘Contact Properties’ and select ‘GoToWebinar Join URL’ (or whatever name you assigned to the contact property) and then ‘Is Known’ from the list of options that come up.
- ‘Apply Filter’ and then hit ‘Save’ in the top right.
- The list may take a little time to process in HubSpot. Go get some water. When you come back, the list is done and there you have it! BOOM!
Now, webinar registrants will be added to this list with their personalized Join Webinar URL associated with them whenever they sign up and you don’t have to worry about adding them manually. Phew!
Step 6: Send Custom Branded and personalized Confirmation & Nurture Emails to your registrants through HubSpot
For your last step, you still need to add a personalization token to your HubSpot emails for the personalized Join Webinar URL to show up in registrants' emails. This is a pretty standard procedure, similar to inserting the receiver’s name - as most marketers already integrate in their email campaigns.
- Create a new email or open up a draft to edit it.
- In the email body, all you need to do is add a HubSpot’s Personalization Token to the email -- this Personalization Token will refer to the new contact property you just created to add each registrant's unique Join Webinar URL. In the email body copy, click on the spot where you want to insert the join webinar URL.
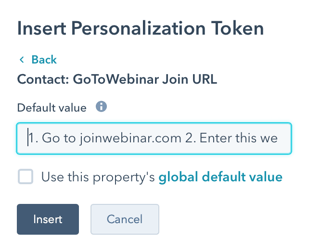
- Then select ‘Personalize’ from all the edit options, choose Type as ‘Contact’ and select the contact property name you assigned (for us it was GoToWebinar Join URL). Click ‘Insert’.


- For the Default Value, you can insert the generic website page to join the webinar, webinar id, etc. This value will only be used if the email is sent to a contact that does not have a GoToWebinar Join URL.
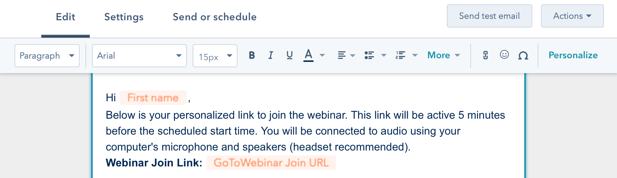
- Once the above steps are completed, this is how the email body copy should look with the personalized token added to the email in HubSpot before sending it to the registrant.
Below is what it looks like in the email after the registrant receives it… That link to join the webinar is unique and personalized to each registrant -- what a beautiful thing!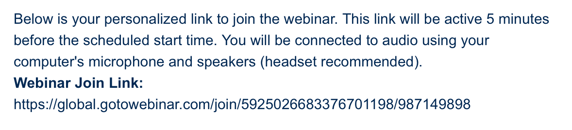
- Try out a test email by sending it to yourself (don’t forget to register for the webinar first so that you are in the list and you have your Join Webinar URL associated with you in HubSpot) and check if the unique link comes up. We suggest trying this out with 2-3 people to be sure.
(PRO-TIP: To test the personalized Join Webinar link properly - you can only send one test email at a time bc the join webinar URLs are unique to each registrant. You must be registered for the webinar and you must send the test email to yourself as the recipient and as the specific contact receiving the email. See image below.)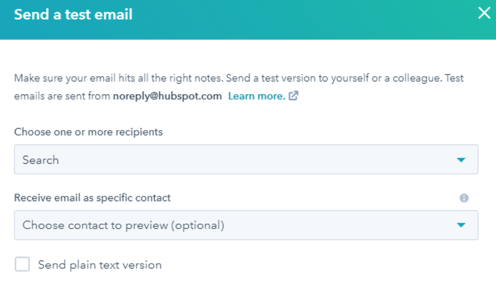
You’ve now officially taken control of your GoToWebinar and HubSpot integration. Woo-Hoo! Best part too is that you seamlessly have control over your brand experience in your nurture emails. Get ready to customize your webinar’s marketing tactics for a strong campaign!